Bongo

So it’s only natural to want to dress up as a piece of Taxidermy for Halloween, right? RIGHT!

I’ll be spending my Halloween this year at The Natural History Museum of Los Angeles County working an event they hold called, NHM All Nighters. It’s an overnight event at the museum where adult guests sleep over in the diorama halls, drink, attend lectures, play games, watch a film and do cool activities. This sleepover themed night is called “The Art of Mounting”, which includes a behind the scenes tour with staff Taxidermist, Tim Bovard and other cool stuff all to do with TAXIDERMY. YEAH! Being on staff at the museum as Special Events Assistant has it’s perks.

We had the option to dress up for the event. A co-worker found a costume of a Taxidermy trophy deer hard online. When I took a look at the idea I was like OMG, this is perfect! SO perfect!!

We are doing this! Instead of a deer, I chose to be a Bongo. The NHM even has a Bongo diorama inside their African Mammal Hall.

Bongos are strikingly beautiful and strange looking antelope. They are the largest and most spectacular of the African forest antelopes, happen to be nocturnal(perfect for a Halloween night event) and are the only ragelaphid in which both sexes have horns.

It’s costume making time! You can make your own Taxidermy costume out of simple and affordable materials you probably have lying around your home. Below are illustrated steps of how I made my Taxidermy costume. Roll over images for a slideshow with detailed instructions.

Supplies:

  1. cardboard
  2. spray mount
  3. sharpie
  4. ruler
  5. cutting board
  6. scissors
  7. exacto knife
  8. felt
  9. paper
  10. paintbrush
  11. paint
  12. paint mixing tray
  13. synthetic fur fabric
  14. tape
  15. reference photos of your animal
  16. hot glue gun
  17. craft glue
  18. headband
  19. face make-up

The World’s Smallest Birds

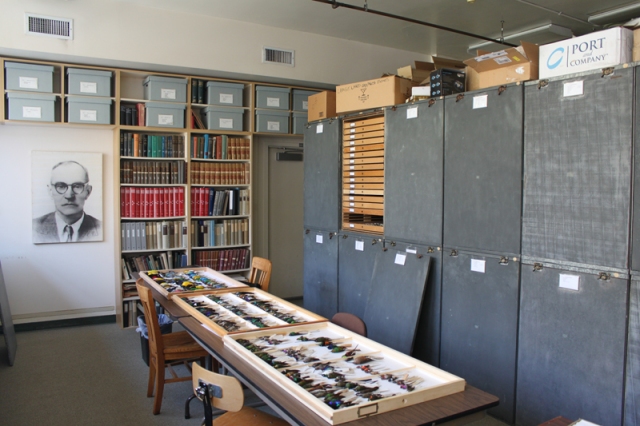
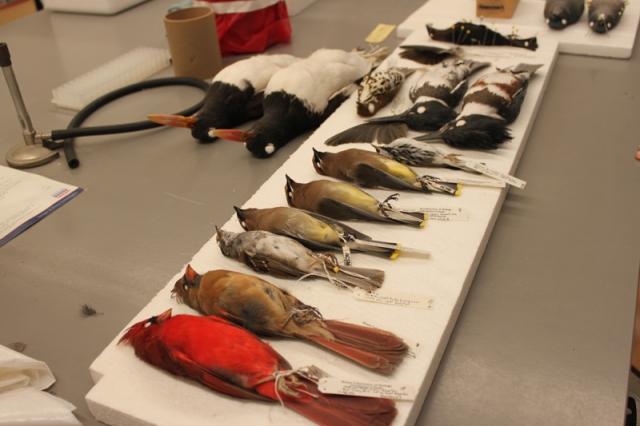
Hummingbirds. The Moore Laboratory of Zoology has an impressive collection of study specimens skins from around the world of this species.

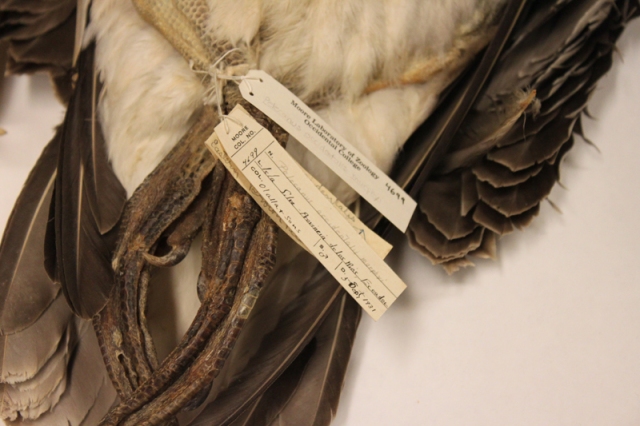
Today I had the opportunity to visit and speak with the staff about their collection while donating my American Goldfinch I’d Taxidermied. While there John, the Curator and Director of MLZ was kind enough to show me around. Their Lab Technician, Whitney also showed me some particular stand outs of their collection and spoke with me about research carried out in the lab that includes DNA sequencing. Did you know they can cut a tiny piece of the birds toe pad off and pull DNA from these study skins? Mind boggling! She explained that after 30 years the DNA shows signs of degradation but is still useful to researchers. Whitney definitely is one amazing lady with all of her knowledge. Most of what she was trying to explain to me about DNA and research was flying past my head like a Peregrine Falcon. Bad joke:/

IMG_0003

IMG_0033

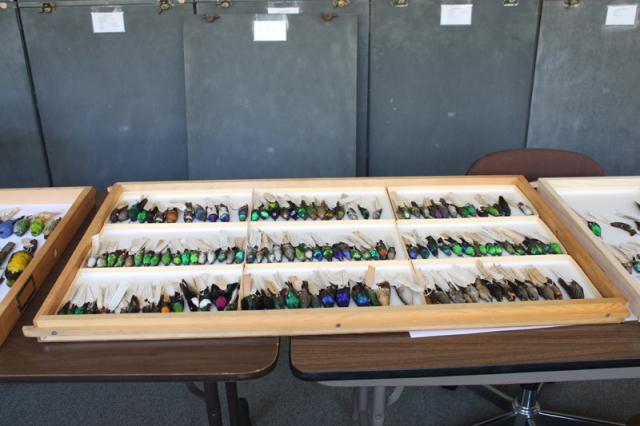
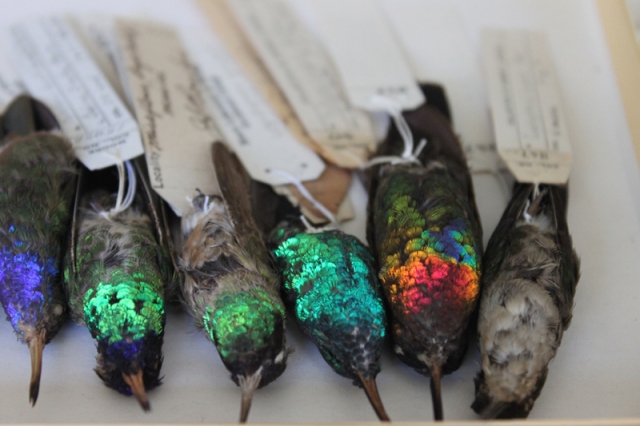
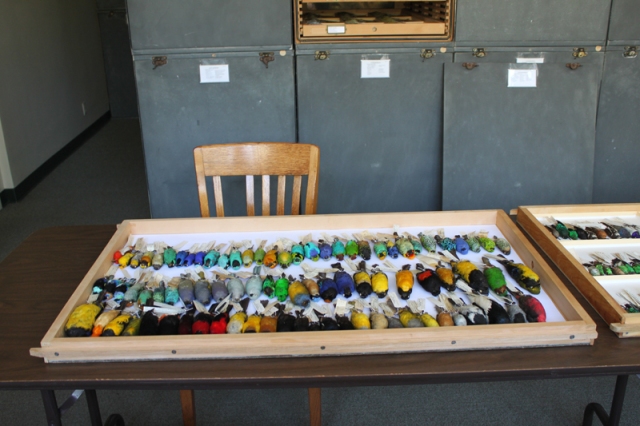
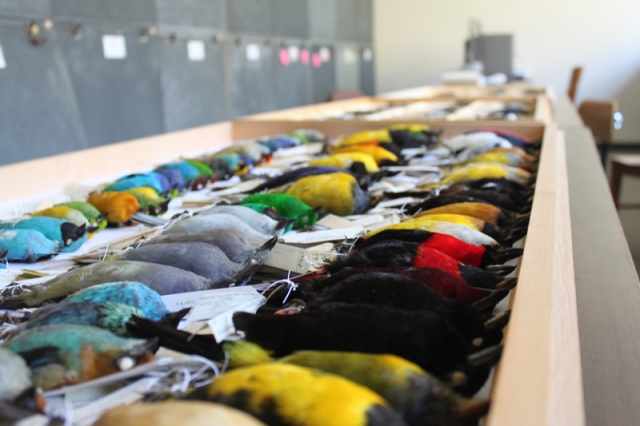
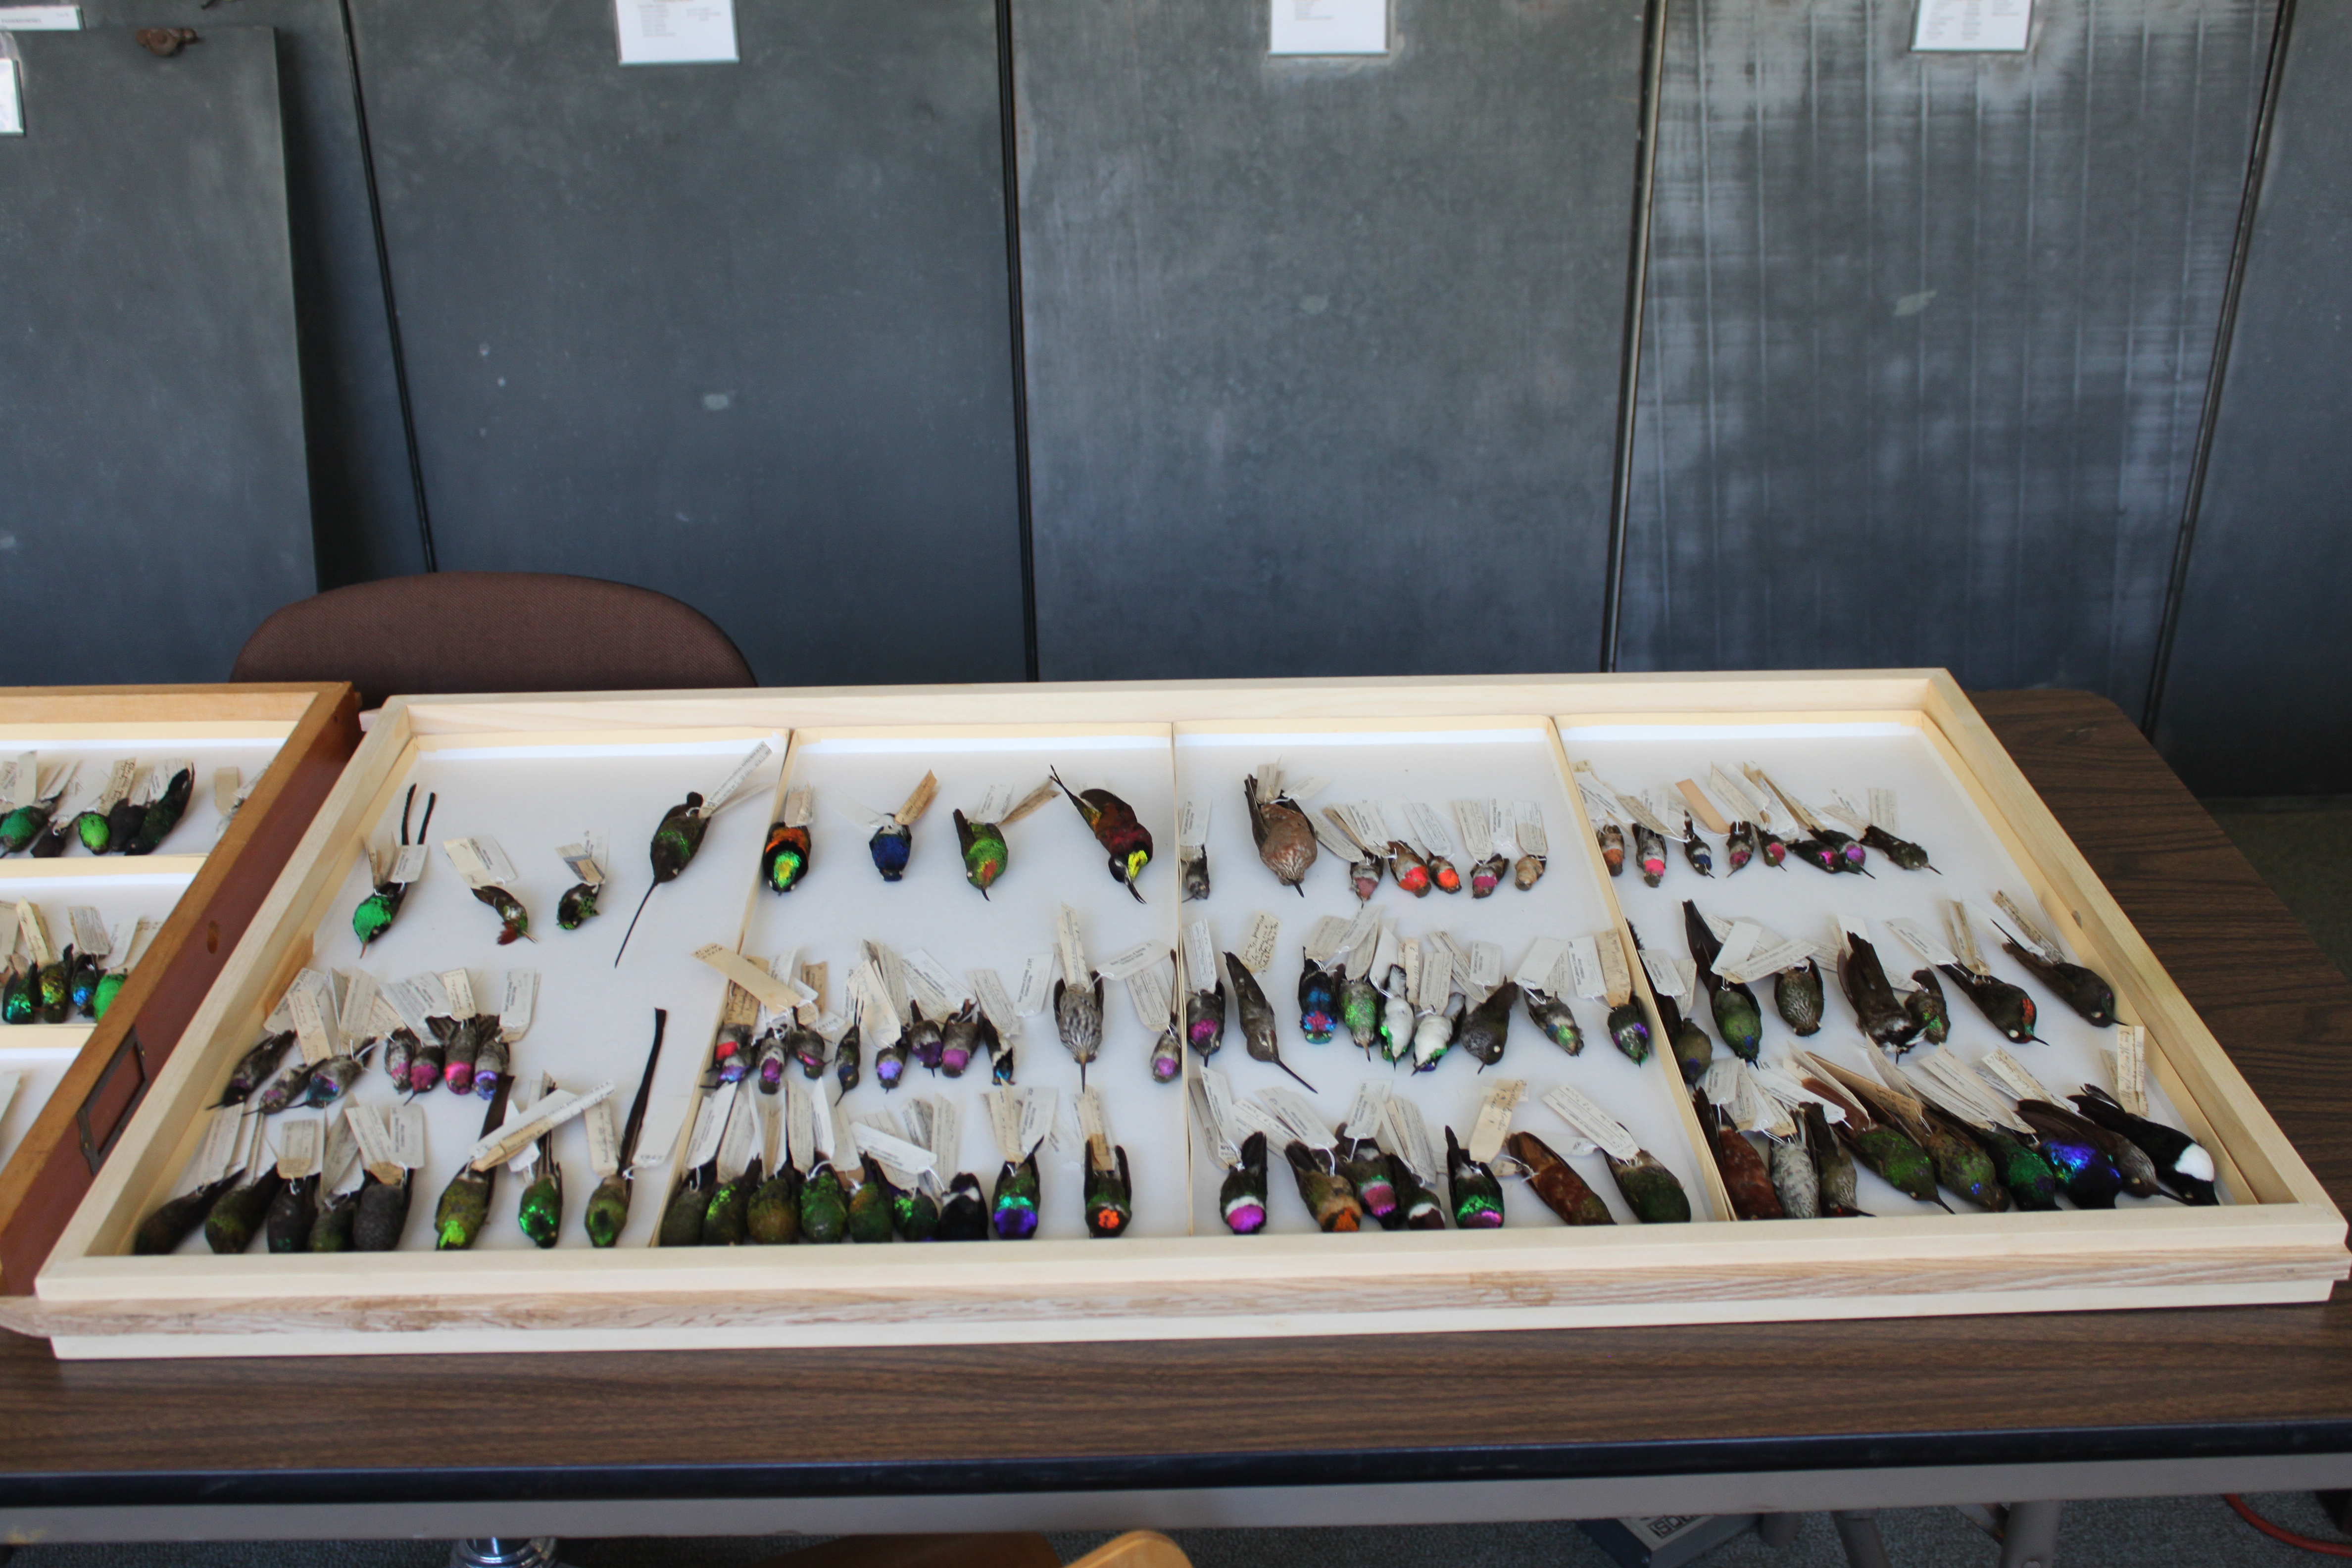
I was nerding out big time over this place even before they opened the drawers full of iridescent Hummingbirds!

IMG_0013

IMG_0034

Pictured within this drawer is the world’s smallest living bird, a Bee Hummingbird. Also, the only bird in the world that has a beak longer than its body in length, a Sword-Billed Hummingbird.

IMG_0035

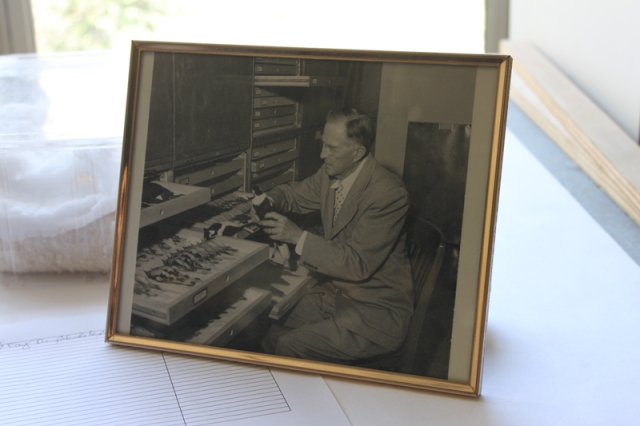
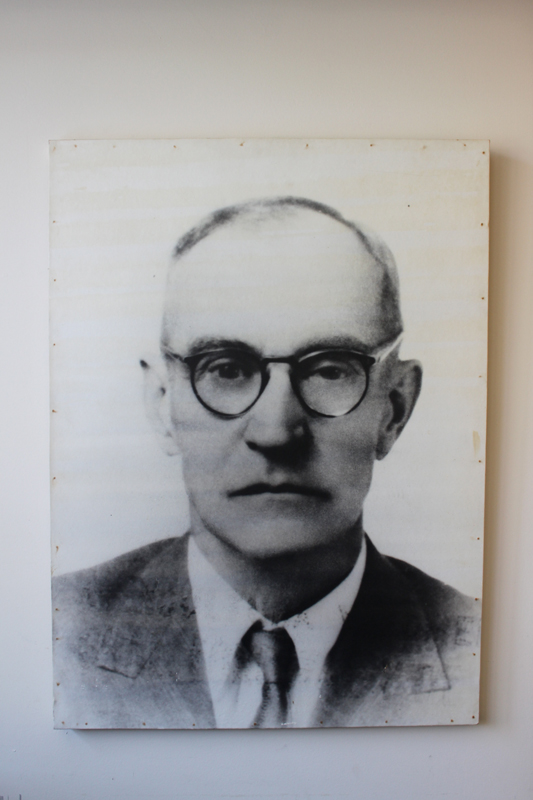
The MLZ was founded at Occidental College in 1950 by Robert T. Moore. Moore was the quintessential adventurer, naturalist, poet, and businessman, in the mold of Teddy Roosevelt. Moore moved to California from the East Coast, where he had obtained his Master’s in Comparative Literature from Harvard. Following his life-long interest in ornithology, Moore embarked on his mission to put together a physical record of Mexico’s bird diversity. Making several trips himself, but mostly through a professional collector under his employ, Chester C. Lamb, Moore amassed over 50,000 bird specimens from throughout Mexico. All specimens were originally housed in Moore’s private home in Pasadena before being moved, along with Moore’s personal library, to the Occidental College in 1951.

IMG_0032_1

These specimens form an invaluable record of Mexican biodiversity from a time before habitats were cleared for forestry and agriculture. The MLZ collection continues to reveal its mysteries in the form of new species, and knowledge of how new species form on the rugged Mexican topography. New technologies mean that the specimens are also revealing the hidden secrets of their DNA for the first time.

IMG_0037

The MLZ’s collection of birds and mammals contains 62,382 bird and 2,158 mammal specimens, placing it among the world’s largest research natural history collections.

IMG_0036

Chester C. Lamb worked for Moore from July 1933 through June 1955, a period of 22 years, and during that time Lamb collected 40,000 bird specimens, all from Mexico. Lamb’s contribution to our knowledge of Mexican bird diversity is unparalleled.

The collection is especially strong in hummingbirds (6,957 specimens), as Moore made special effort to obtain exemplars from nearly every species.

I was on bird overload today so I didn’t take notes on specific species I snapped photos of but here are some that stand out from today.

IMG_0059

Here’s the lab where they continue to research and prepare specimens to add to the collection.

If you live in the Los Angeles area, this is a hidden gem you should check out if you are into Taxidermy, Natural History or Ornithology. Here are directions. Thanks for everything birds and staff of MLZ!

Part of The Family

It happened on a warm sunshine filled Thursday in July.

I finally got an interview at my favorite place for inspiration, learning, wonder and curiosity; The Natural History Museum of Los Angeles. It meant so much to me to have a shot at having a job with this institution. I was full of emotions before I left my apartment for the interview that day.

After the interview for Special Events Assistant, I sat down and made some thank you notes to send to the lovely ladies who interviewed me for the position in the Advancement Department.


Fast forward a couple more weeks and I got confirmation that I’d been chosen for the position! I was over the roof to hear the news and be a part of the team to make it all happen. I’ll be helping out with weddings, overnight sleepovers, filmings, dinosaur themed birthday parties for kiddos, haunted museum, festivals, friday nights in the garden, etc. the list goes on and on! I’ll even be working some days at The Page Museum.

So happy to be a part of the family!

Are Birds Dinosaurs?

“Dinosaurs were reptiles that first appeared 230 million years ago and ruled the Earth for 160 million years. They evolved into diverse groups that flourished and became extinct at various points in time. But one dinosaur group did not become extinct. Birds evolved from a larger group of predatory dinosaurs called theropods that included Tyrannosaurus rex.

At first glance, the skeletons of a modern bird and Archaeopteryx, the oldest known bird, may not look-alike. But both have a wishbone and a large breastbone. And the dinosaur Velociraptor also shares these bones too. All of these animals also have hollow bones. These are clues that tell us that birds inherited these features, among others, from their dinosaur ancestors.

Most dinosaurs laid symmetrical eggs. But some theropod dinosaurs laid lopsided eggs. Compare this to the eggs you most often see – chicken eggs, which are also lopsided. Chickens and all other birds inherited this trait from their theropod ancestors.

Caudipteryx had feathers like those of modern birds. But it wasn’t a bird, it was a theropod dinosaur. Many theropods had bird-like features – more than 20 known species – evidence that birds originated from within this group.”

-NHM Dino Hall Training Guide 

That was something I found interesting that we learned while training for the dinosaur exhibit hall at the NHM. While I’ve been enjoying my time volunteering at The Natural History Museum I’ve also been working on certification of other exhibits. The training that was offered after Grandes Maestros: Great Masters of Iberoamerican Folk Art exhibit was for Dino Hall. I attended both training sessions they held on Sunday mornings (coffee!). I’m so excited to know more about dinosaurs and to share the knowledge with museum guests. I especially love to show the kids who visit NHM the coprolite on display or better known as fossilized Dino poop! Their reaction is priceless. “Does it still smell bad?”

O yeah, Fruitadens are my new favorite Dinosaur. What’s yours?

Great Masters

The Natural History Museum offers training sessions to Volunteers each month to become certified in different exhibits. After attending an exhibit training you are able to start the process of being certified. After each successful exhibit certification you receive a pin for your lanyard and are then able to be scheduled in that particular exhibit as a floor interpreter.

The first training offered since I became a Volunteer back in October was for the exhibit, Grandes Maestros: Great Masters of Iberoamerican Folk Art. I eagerly signed up and attended the required two training sessions. During training we learned about the skilled artisans representing the twenty-two countries that make up Iberoamerica. There was so much information to soak up in the two sessions but we were also versed in VTS (Visual Thinking Strategy) to help with interpretation within the exhibit. In other words, you don’t have to be an expert on every fact to give a guest a positive interaction. Being back in the classroom and learning with enthusiastic people was a great feeling and kept my embers of curiosity burning for the subject.

Oh, and we even received a little handbook containing featured objects on display, artisan techniques, history, etc. of Iberoamerican Folk Art. Inside the cover it says, “Today only a small part of society is aware of the wisdom and experience of the great masters – however, the beauty of their expression is genuine and the technical complexity is obvious, therefore it is easy to inspire positive reactions aimed at recognizing their artistic status by making artists known and considering understanding of their worth.” A lengthy but very true statement in my opinion.

The celebration of the Great Masters exhibit opening was marked with an all day Latin Festival. I volunteered that day to help with activities planned for guests. I helped out guests making tin art, pinatas, gourd dolls and spent some time at the welcome desk. My favorite was working at the tin art and pinata making stations teaching the kids and helping them make a piece of artwork they were proud of.

Here are some pictures of the foyer where some activities were taking place..

After finishing my shift I had the chance to see the Great Masters exhibit. I was super excited and couldn’t wait to see the objects in person we’d spent time learning about in the weeks before! It was more beautiful than expected. The clay section was breathtaking, the details, the stories being told, the life size paper mache pieces, ceremonial masks, intricate textiles and the list goes on.

Here are some pictures from the exhibit..

I’m proud to have obtained my certification today for the exhibit, Great Masters of Iberoamerican Folk Art.

Yay, that means a cool new sugar skull pin for my lanyard..

While being observed as part of my certification we had a big group of Eleventh graders and another group of younger kids come through. It’s so funny to me that almost every kid had a tablet or smartphone held in the air snapping pictures immediately instead of just enjoying the pieces in front of them. I really made an effort to talk with the kids about what they liked and why. It really does make a difference to ask them questions and have them interact with you and the piece. The tablet and smartphone goes away and they start asking questions and getting excited. I love it!

First Days Are Always Scary

It’s the end of October and that means it’s time for pumpkin carving, ghost stories and Haunted Museum at The Natural History Museum. The museum closes to the public and members enjoy an amazing evening full of Dia de los Muertos arts & crafts, curatorial collections, and spooky festivities.

I was thrilled that this would be my first day to volunteer at the museum! All you had to do was come dressed in all black and attend the information session beforehand where you would be assigned your roles for the evening.

Liz the Volunteer Coordinator must have remembered my interest because I was scheduled at the curatorial table, “Gravestone Taxidermy”! Thanks Liz! I was super excited I would have the opportunity to meet Master Taxidermist Tim Bovard of NHM!

There was expected to be more than 800 members in attendance. The Taxidermy table was located in the museum’s foyer that was decorated with marigolds, hanging paper papel, painted donkeys, and skeleton gobos on the ceilings. The foyer also had snacks and refreshments, a live Charles Darwin, and a DJ spinning ghoul tunes. I caught Darwin tapping his foot to an EDM track when it came on. I wonder what he’d think of that music if he were around now?

At our table Tim had on display a variety of specimens and Taxidermy supplies to educate guests about the art and process. Before the guests arrived I had time to ask Tim any questions and learn about the specimens.

It seemed a lot to memorize at first but after I observed Tim talk to a couple of guests I felt confident to do the same. Since everything is still fresh in my mind I’ll tell you all of the specimens. There were a bunch of cats; a fishing cat, serval, jaguar, cheetah, mountain lion, leopard, snow leopard and a bobcat skin. For birds we had; a red collared parrot, California quail and a raven. Among other animals was a horned lizardCalifornia ground squirrel, cast rattlesnake and a coyote jaw.

The supplies to demonstrate how Taxidermy is done consisted of a small wrapped baby possum, sculpted foam body, glass eyes, artificial animal jaw and a foam nose. Oh! Lets not forget the cute stuffed animal cat to educate kids on the difference between Taxiied and “stuffed” animals. Tim would ask them, “Which one looks more realistic?” They always got the question right:)

What most guests don’t know about the museums diorama is that the habitats are all man made. Any plant life must be painstakingly be recreated by hand. Tim explained the process he used to create leaves. First he would vacuum mold a real leaf and then cast sometimes thousands of leafs and have to hand cut and paint them. He had out on the table an example of a fig that he’d cast out of foam and had yet painted.

Our “Gravestone Taxidermy” table proved to be a hit with kids and adults! Everyone liked stroking the animals and people were fascinated to learn how Taxidermy is created. I had the best time on my first day volunteering with Tim and really enjoyed talking to the guests, especially the kids. Kids are my favorite!

Behind-The-Scenes

I may have not got a spot immediately volunteering in the Taxidermy studio behind-the-scenes at the The Natural History Museum but I got a tour!

How did that happen? Well my instructor Allis from Prey Taxidermy is part of the museum staff at NHM. Before she was staff there she was a volunteer, training several years behind-the-scenes with Master Taxidermist Tim Bovard of NHM.

I’d mentioned the story to Allis about Houdini back when I knew little about laws protecting wildlife. Allis let me know that it was actually illegal to posses a raptor so I decided to donate Houdini to NHM. The day I met Allis at the museum to give her Houdini she was kind enough to give me the backstage tour!

If you think there are a lot of animals on display to the public you should see behind-the-scenes! They have so many works in progress all around. The NHM is unique in that it is one of the only museums in the country to still employ a full-time Taxidermist. Dioramas and exhibits slowly change unlike other museums in the United States. You can see in the above photo the pulley system used back when the museum was first getting ready to open and they had hundred of animals (some of them very large) to Taxidermy.

In the hallway are giant chest freezers full of specimens and even a huge walk in freezer as tall as the walls! We walk inside the studio. I have to pick up my jaw off the floor for what I see! Taxidermy overload! Allis pulls out drawers of old Taxiied monkeys that have been preserved with a wax cast so small details are preserved like fingerprints. Glancing around I noticed a folded Sumatran Tiger skin in progress atop a (another?!) freezer. I couldn’t help but touch it.

Allis was bursting with information and happy to share how things are done at the museum with me. Importantly all of these animals died naturally and were salvaged from either zoos, wildlife rescues, roadkill, etc. Sometimes two of the same animal is used to create one finished piece because of damage to the animal.

Before I left I wanted a little pouch filled with magic dust. Why? So I could sprinkle it on all the animals to make them come to life, duh. Remember when the moose head comes to life in ‘Return To Oz’? I love that movie!

Before leaving I stood in the center of the magical studio and shut my eyes. If you use your imagination you start to shiver from the cold. I was at the North Pole listening to the Arctic Sea with my friend the walrus right beside me.

The Museum

Given my new interest in Taxidermy and butterflies I paid a visit to The Natural History Museum of Los Angeles.

I had been to the museum before but this visit was different. I spent hours filled with curiosity causing wonder to bloom within me this time. I soaked up as much knowledge that day as I could. My soul felt like a parched desert that had just been rained upon. Learning never felt so good. I didn’t want this feeling to go away so I signed up to volunteer.

You can volunteer for either a position as a general interpreter or a behind-the-scenes position. I really wanted to help behind-the-scenes in the Taxidermy studio! To my disappointment behind-the-scenes opportunities come up less often but they welcome you to start volunteering as an interpreter until a space opens. I took their advice and signed up to start as a general interpreter out on the museum floor. It was intimidating knowing I’d be educating groups of people about exhibits I knew little about. What happens if they ask a question I don’t know the answer to? What happens if some little rug rat tries to feed his slimy lollipop to the tarantula and the spider get loose? What happens if someone steps on the spider killing it and shrieks and the seniors all faint and break hips? WHAT THEN?!

I can handle this.

I attended the orientation sessions that were required to start as a general interpreter in the discovery center. The space is amazing with huge glass walls so the sunshine can pour in. A giant polar bear upon its rear legs greets you at the entrance and a forest of mammal heads decorate the walls. Yay, Taxidermy! There are encased animal specimens for children to arrange their own museum. Yay, MORE Taxidermy! Live insects are squirming in aquariums for observation. Who doesn’t love tables wrapped in paper with crayons to draw with? Antlers, minerals, microscopes, oh my! This place is a kingdom of discovery if you’re a kid, and even if you’re not you’ll be taken back to that happy place.

Of Flesh and Feather

I caught the number eighteen bus downtown on a face melting hot Wednesday. The three day workshop on how to prepare a museum quality bird had started. In class we would be learning with a European Starling that was ethically sourced from abatement work. The species are considered invasive to North America.

I stared down at the wet de-thawing bird in front of me lying on a tray with some tools. Then I glanced up and around the room at the other five students and instructor, Allis Markham from Prey Taxidermy and The Natural History Museum of Los Angeles. I’d spent time in the days leading up to class watching videos from Beaty Biodiversity Museum on how to prepare bird specimens, but having a dead bird in front of me was different.

The instructor got started right away by having us stand around her and watch the first step of making the incision down the belly of the Starling. We all went back to our seats and gave it a go. I expected the bird to smell when I sliced it open but there was no odor thank goodness. I went to deep towards the tail of the Starling and cut a little bit into its intestines. For a nicer term, I’ll call it spaghetti. I admit it made me squirm. If I was at home doing this I probably would have had a hard time continuing. Being with other people doing the same thing was the comfort I need to carry on.

So the classes continued in the same fashion step by step each day.

A brief description and photos of the process follows..

  1. De-thaw the frozen bird under cool running water, It’s a very weird feeling holding a dead animal for the first time.
  2. Skin the bird
  3. Detach it’s leg bones from the hips
  4. Cut off the tips of each breast so you can detach the wing bones from the body
  5. Invert the skin and skull up to its beak, Be careful, don’t cut those eyelids and lashes off! 
  6. Remove the eyes, The instructor Allis said they are just like blueberries. Yeah, blueberries are my favorite food. I thought, this better not ruin them for me!
  7. Pull out the tongue
  8. Trim the neck at the base of the skull. The body is now detached from the skin, This part made me shudder because of the feeling of cutting through its windpipe.
  9. Before the body gets frozen for dog treats take body measurements for reference to make bird body
  10. Cut a triangle of bone from the back of the skull and scoop out the brain, Surprisingly the brain is like red snot, I was expecting a tiny brain like that of a human’s.
  11. Make an incision both wings to remove the tendons, flesh etc.
  12. Continue to remove all flesh from bones and use wire brush to remove fat from skin, Tedious part
  13. Fill skull cavity with clay and place glass eyes
  14. Re-invert the skin back over the bird’s head
  15. Wash bird in Dawn thoroughly, Use this kind so you help our wildlife!
  16. Place bird in Chinchilla dust
  17. Use a hairdryer on cool to blow off dust and dry feathers
  18. Use your measurements you took earlier to create an anatomically accurate body out of wood wool wrapped tightly with thread. You can use foam tubing and wire for its neck
  19. Wire the legs and wings and secure the wire to the bones with strings
  20. Attach wired wings and legs to body by pushing through the wood wool and twisting the wires together.
  21. Sew up the bird with a needle and cotton thread
  22. Place bird on base, etc. with the wires from the bottom of the bird’s feet
  23. Pose bird and groom feathers, you can use tape, clips and pins if needed for positioning
  24. Let the bird dry in position for a week
  25. Remove any tape, clips and pins
  26. Display your bird and be sure to properly care for it. It’s a good idea to keep away from direct sunlight and dust the bird if not in a case once a month so it will last years to come. Oh, if you have any pets that would consider it a meal keep it out of reach!

Bookstores still exist today. One happens to be in the same building as where classes were held. Funny enough its name happens to be The Last Bookstore. I bought myself an Encyclopedia of Ornithology(the study of birds) there and read it front to back. In the end I had learned so much from both the workshop and book. It kept the fire burning..